Okay, now things are getting interesting. We’re tackling real live data from the internet using APIs, and this opens up a world of possibilities to build up a good portfolio.
So, the app is Clima (short for climate, i think – who cares). It’s an app that gives weather information using the OpenWeatherMap APIs. There’s not a lot of features in this app other than getting the weather using 1) the current location obtained by the GPS 2) city name entered by user. The idea of this app is to get familiarised with the networking side of things, and most importantly asynchronous programming.
The app UI looks like below


Points to note
- So the first screen displays the temperature, and a message which includes the name of the city.
- if you click on the location icon at the top left corner, it fetches the current location and gets you the weather (incase you’re moving and your location has updated from the last time you’ve checked)
- if you click on the city icon on the top right corner, you jump to the city screen
- the city screen is the image on the right; basically has one text box for the user to type in the city name and on clicking the ‘Get Weather’ button, it goes back to the weather screen and displays the weather for the city the user just typed in.
simple right? Let’s dive into it.
App Flow
a minimalistic mockup of the app flow
Points to note
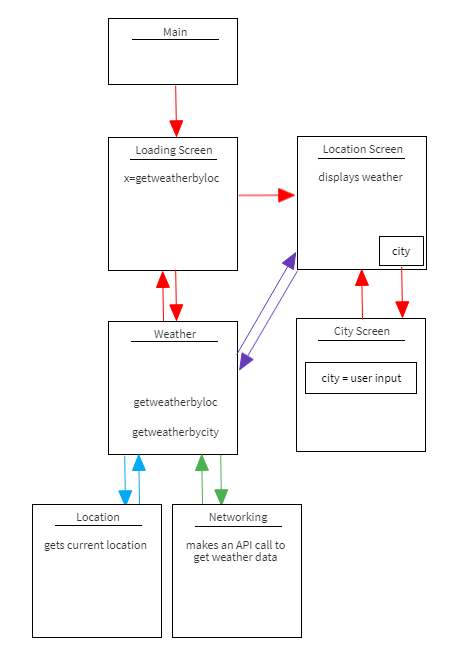
- the app begins from main.dart as usual which redirects to the loading_screen.dart
- the loading_screen doesn’t really add to the functionality. the only purpose is to do the weather call and display it as soon as the app loads up, while displaying a buffer animation while the user waits
- the weather.dart has two functions inside it’s class. one is to get weather by location, and the other is to get weather by city name – both using distinct api calls
- location.dart retrieves the current location using the geolocator class
- networking.dart makes the api call once it has the location cordinates or city name, and returns the weather data as a json decoded object
- Once you have the weather retrieved by either of the api calls, it’s displayed on the location_screen.dart page
- from the location_screen.dart page, you can click on the city button to jump to city_screen.dart
- city_screen.dart only exists to provide a textfield for the user to type in city name which is then returned to location_screen.dart from where city_screen.dart is called. In the location_screen.dart page, a new weather call is made by passing in the city name and once you have the weather, the app ui is updated using setState function
Key Elements
Loading_Screen.dart
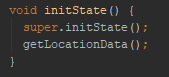
- loading_screen.dart is the first page passed on by main.dart, and in order for the weather call to be made as soon as the app loads, we have to use the initState() function
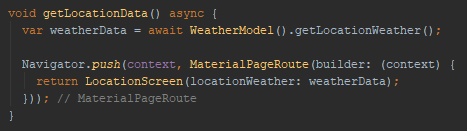
- getLocationData makes a call to the WeatherModel class to access a function called getLocationWeather(). This returns the weather data in a json decoded format which then allows us to tap into the individual elements
- Once you have the weather, it is then passed on to the Location_Screen to be displayed on screen as a parameter because at this stage you’re initialising LocationScreen which you’d see in the next section has a property defined. The purpose of that property is to collect weather data passed from LoadingScreen.
- we could have entered this above lines of code in the initState function and removed the need for getLocationData function, but because the weather call can be completed at any time and the app needs to wait till it completes, because its using the result value, we need to use async and await which cannot be used with the init function. Thus the need for another function.
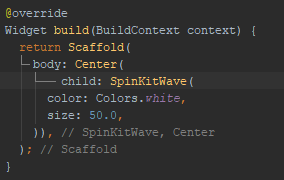
- SpinKitWave is a flutter package we use to display the buffering animation.
Location_Screen.dart
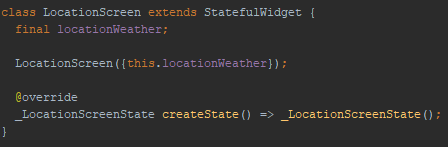
- as the LocationScreen class is initialized, property locationWeather would have the weather data assigned to it from LoadingScreen
- This happens inside the Stateful object as that’s the entry point to this class
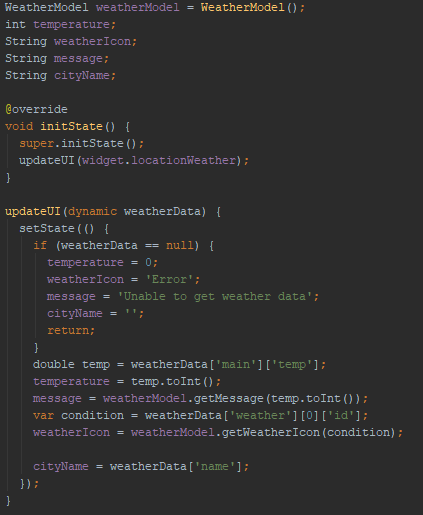
- inside the state object, we begin with creating certain variables to retrieve specific values from the weather data
- we want to be assign the weather values to our display elements in the app as soon as the page loads, so we do this inside the initState() method.
- widget allows us to tap into the locationWeather property in the Stateful object from the State object.
- we then pass it to the method updateUI
- updateUI checks if the weather data returned is null, and assigns the values accordingly to the variables declared earlier, and this is done inside the setState() function.
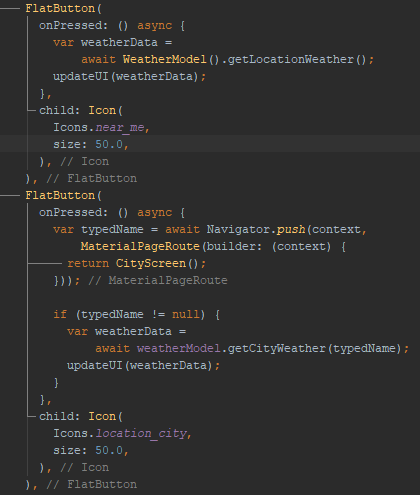
- inside the build method, is our UI. There’s two buttons at the top of the screen. Location button and City Button
- Location button – retrieves the weather of current location (in case you’ve moved from the last time you’ve checked), calls the getLocationWeather() method when pressed, assigns it a variable weatherData and passes it to the updateUI() method.
- City Button – takes you to cityScreen to allow the user to type in a city name. So cityScreen() is pushed, and the value returned is assigned to a variable typedName. If typedName is not null, getCityWeather() is called passing in typedName. Result is assigned to a variable weatherData and updateUI() is called.
Weather.dart
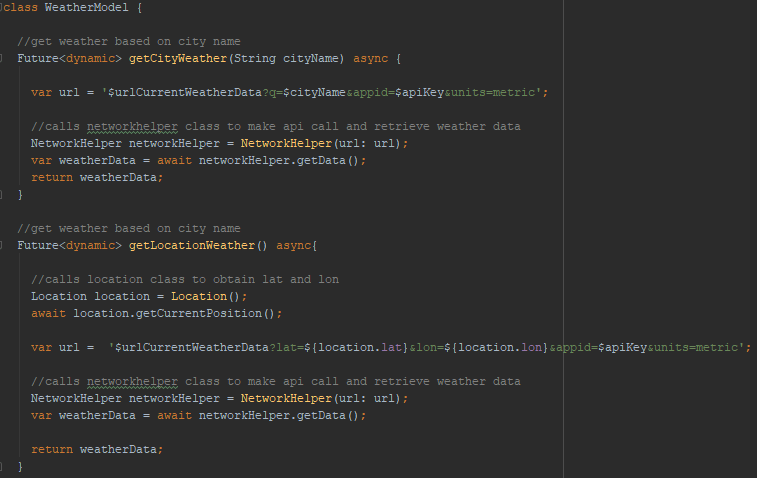
- The WeatherModel class has the two core functions in this app – to retrieve weather using location, and weather using city.
- when getCityWeather() is called, the cityname obtained from the CityScreen is passed on as the argument.
- the WeatherModel class makes use of two classes – Location, to obtain current position and NetworkHelper to make the api call and get the weather data
- the NetworkHelper class when initialised takes a url as parameter. The url from WeatherModel could either be the one with location, or the one with city. (since they’re two different urls)
Location.dart
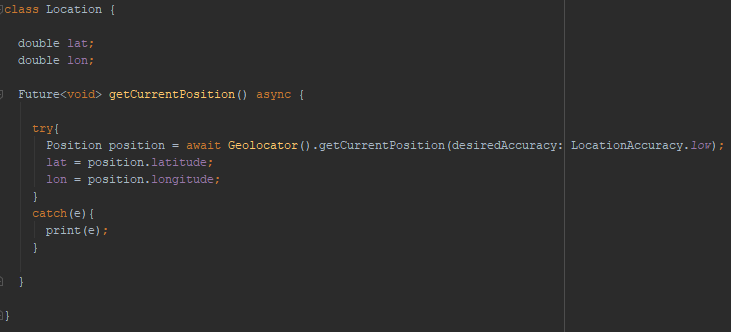
- Location class makes use of the Geolocator class to get the current position, from which you can then extract the latitude and longitude, and are assigned to the properties lat and lon
Networking.dart
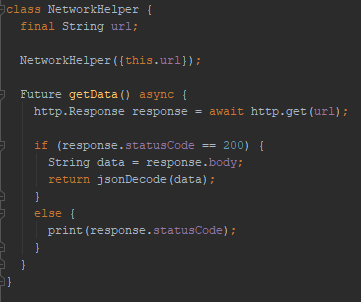
- The NetworkHelper class when initialising takes in the url from WeatherModel.
- http.get() method is called to obtain a response,
- if the statusCode is 200 (success), then we return the json Decoded data back to WeatherModel
City_Screen.dart
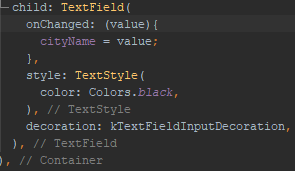
- the TextField on CityScreen has an onChanged event, value of which can be assigned to a variable. This means every change made to the current value of the textfield is applied in real time to the variable cityName.
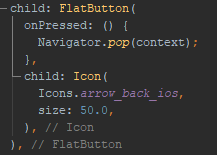
- the back button at the top left corner of the page takes you back to the LocationScreen. basically means pops the current page.
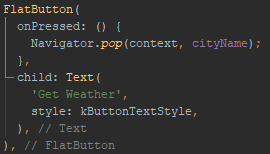
- the button titled ‘Get Weather’ when clicked on pops the current page passing the city name stored in var cityName with it. This is then used by LocationScreen to make the api call to get weather data
pubspec.yaml
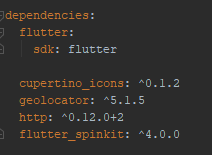
- we’re using the above dependencies.
- geolocator helps with retrieving current position. as part of installing this package, you have to add couple of lines to Android Manifest and info.plist file for android and ios respectively. This is to show a prompt to the user giving them options to allow, deny app’s location usage. read the package documentation for more details
- http allows us to make the http request calls
- flutter_spinkit is for the loading screen animation
update: code on git to follow

wow!! 31Full Stack Dev 01: MongoDB basics
LikeLike