This is a new series and a new chapter in my non-existent career. Aim here is to rack up the skills to become a full-stack dev, and blog sort of mini tutorials along the way. But more importantly, this is more like notes for my future self.
So after some research, i narrowed down my focus to the MERN stack. The main reason being – this is all Javascript; so it just feels like an extended learning of the same topic in hand and applying them in different environments – as compared to learning completely new languages. For a beginner to coding, that aspect of this stack does feel good, since you have less chances of your brain exploding after being exposed to multiple new things.
anyway…
The MERN stack is made up of
- M – MongoDB
- E – Express
- R – React
- N – Node
And this is how the stack would look like from an application point of view.

React is all about the user interface of your application. Node handles your backend server, and Express makes it easier to do backend tasks. Lastly, MongoDB is where you store your information. And that’s where I’ll begin – from the ground up – building a database in MongoDB. Then in the next post, I’ll create a server in Node. At this point, I don’t have an application in my mind that I’ll eventually build, but I’ll figure that out along the way.
So, hang tight (or not!)
Let’s MongoDB
There’s couple of options with MongoDB as to how you wanna set it up – locally or on the cloud. I am going with the cloud option here. So the URL is https://www.mongodb.com/cloud. Sign up if you haven’t.
Once you’re in, you’ll see this screen.
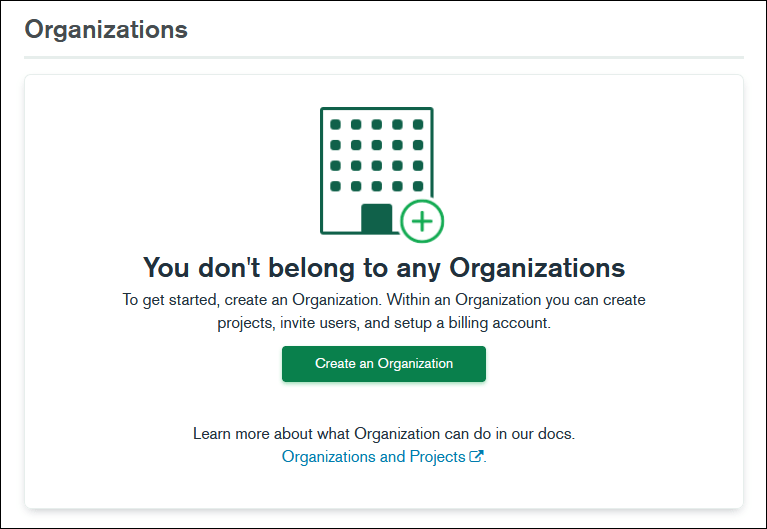
Alright,
- Click on Create an Organization.
- On the next screen, name your Organization, select the MongoDB Atlas
- Click Next
- I don’t want to add any members at this stage, so I’ll click on Create Organization
It will do its thing, and your organization is created. Now, I’ll go ahead an create a Project to work on.
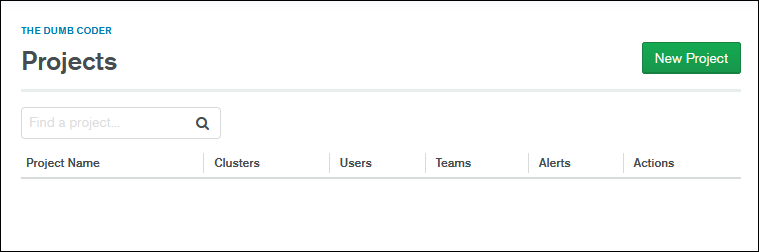
So, I’ve got a Project setup now – called Mongo 101.
The plan here is to build a database to list out some of my favorite movies and TV shows.
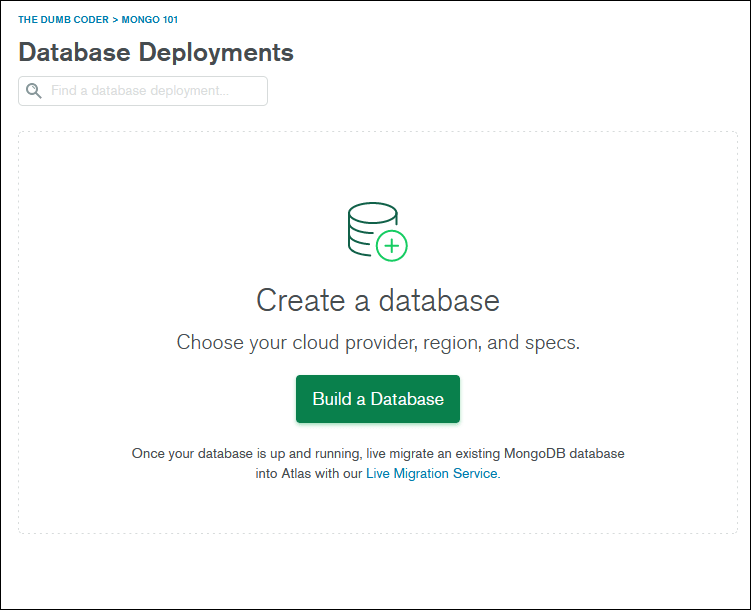
So,
- I’ll click on Build a Database
- Select the Shared (free) option and click on Create
- So now we’re creating a Shared Cluster. A Cluster is basically a collection of servers where our database will be stored.
- In the next screen, I’ll choose AWS and go with a region nearest to mine. I live in NZ, so I’ll go with my neighbours – Oz.
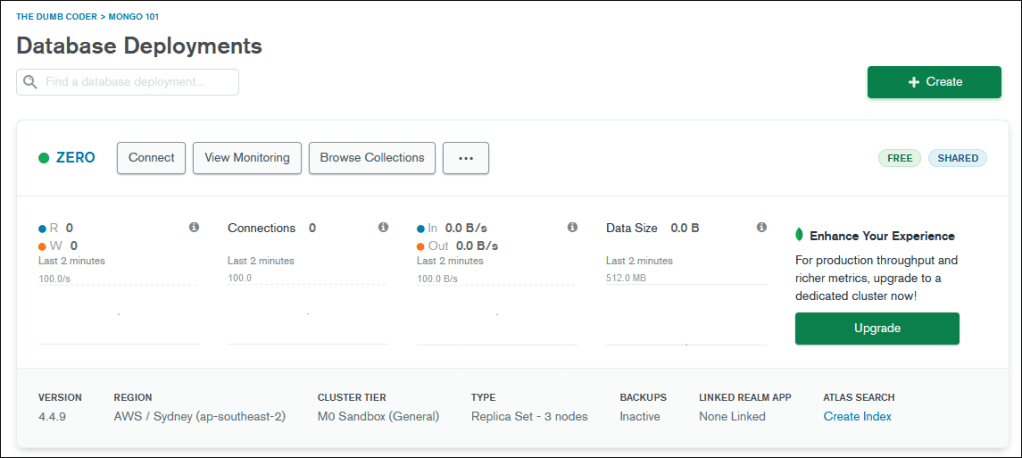
- I’ll leave the other options untouched, except for the Cluster Name. I’ll change it to ZERO (for no reason!)
- Click Create Cluster
there we go. The cluster is ready.
To create a database,
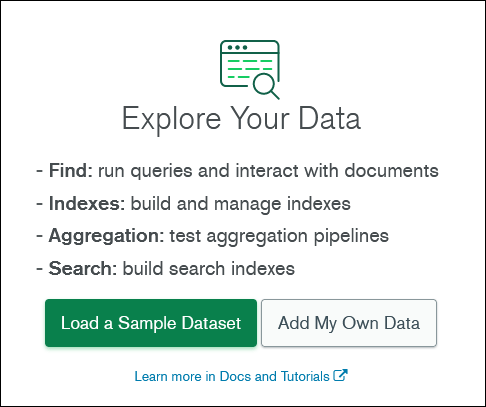
- click on Browse Collections
- I don’t want a sample dataset, instead I wanna create my own. So i click on Add My Own Data
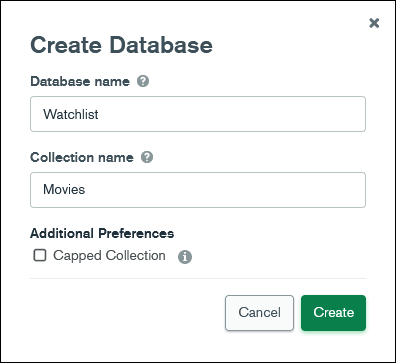
I’ll create a database called Watchlist, and also create my first collection in the process called Movies.
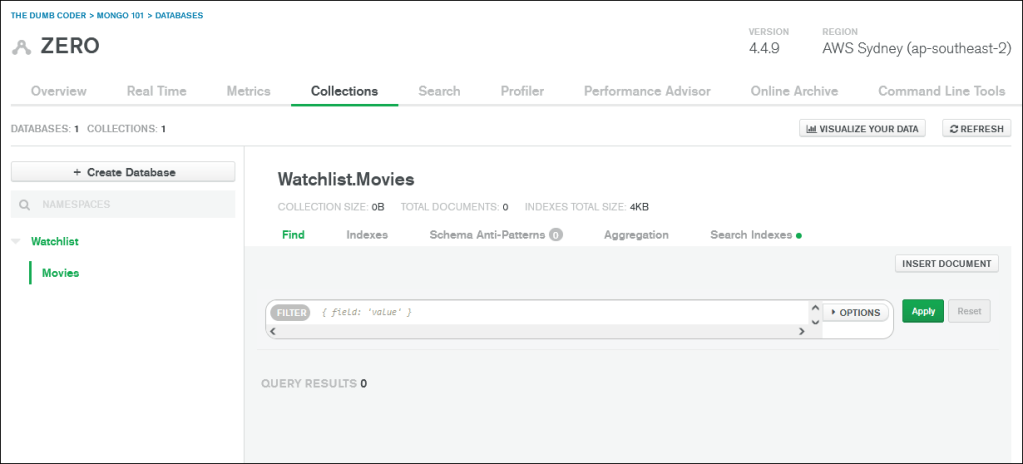
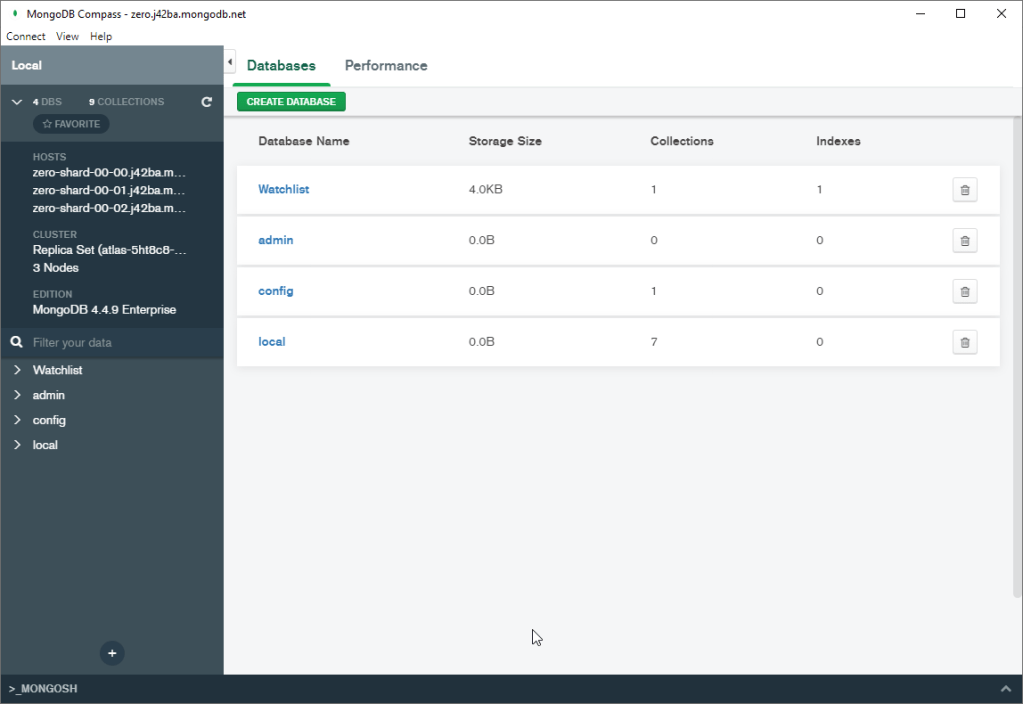
Sweet, so that’s step 1 completed. Here’e the progress so far. Everything I’ve created so far can be seen in this one screenshot below.
Right, now – I am not a big fan of using the Web UI when there’s a desktop app for the same that actually works. And that’s called MongoDB Compass. You can find it here – https://www.mongodb.com/products/compass
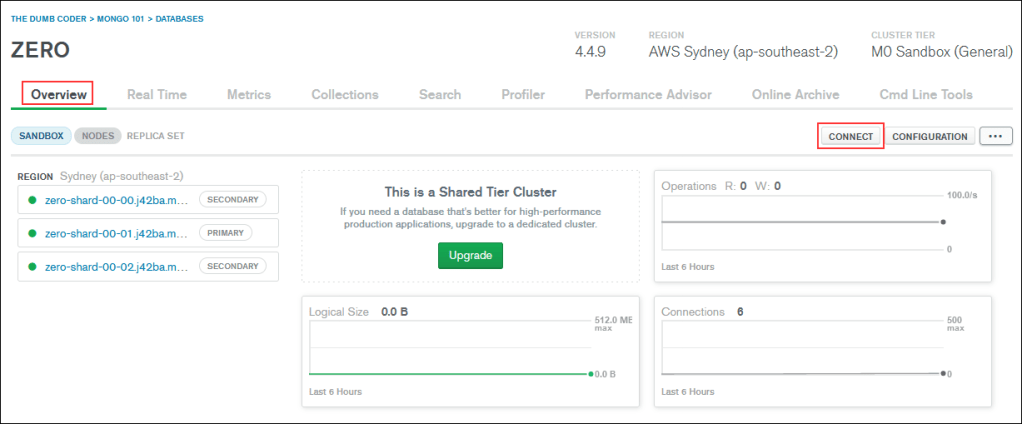
Now, I need a connection string for my cluster so I can connect to it using Compass. Here’s how I can find it.
- Click on the Overview tab
- Now click on Connect
Now in the pop-up window,
- I’ll click on Allow Access from Anywhere since I want this db to be accessed from anywhere. I am assuming when it’s a more serious application, you may wanna introduce some sort of restrictions in terms of IP addresses. At this point, i don’t care.
- The IP address now shows 0.0.0.0/0 which translates to any IP, and I click on Add IP Address
- I then create a username and password. Take a note of this, as you’ll need it soon. then click Create Database User.
- Now click on Choose a Connection Method
- Since I am planning to view the database in Compass, I’ll choose the last option – Connect with MongoDB Compass
- I select I have MongoDB Compass
- Copy the connection string, and I’ll close out of it.
Back in Compass,
- I’ll paste the connection string after replacing the ‘<password>’ with my actual password
- and click Connect

and here we go.
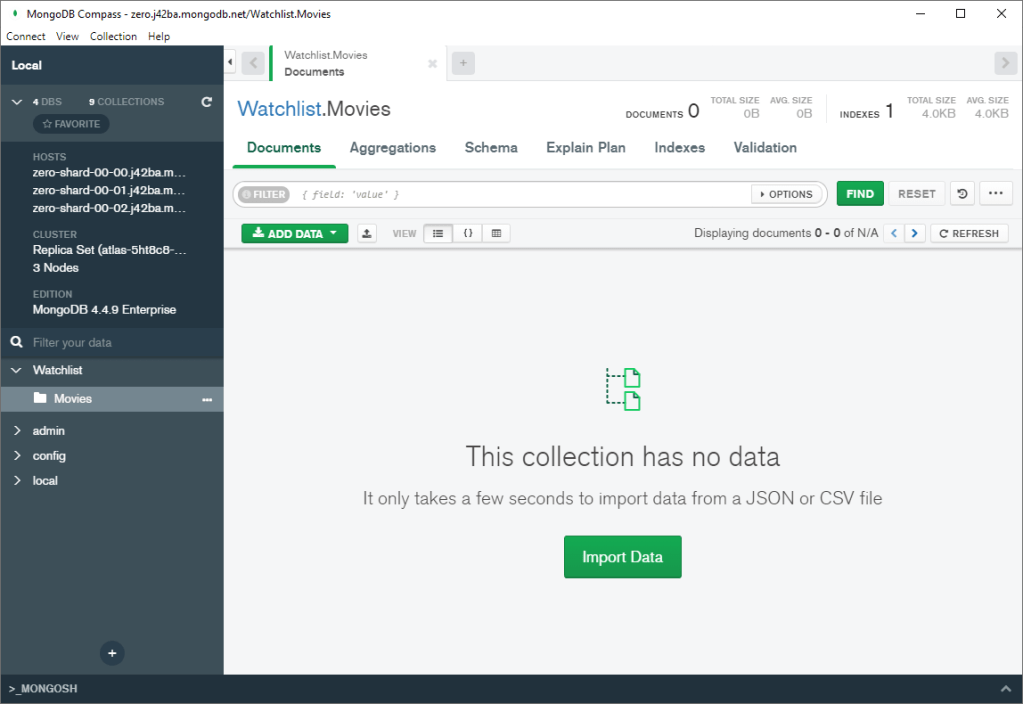
I’ll click on Watchlist and then on Movies. Now I am inside my collection.
Time to add the data.
Let’s play!
Based on the limited time I have spent with MongoDB, I figured out there are 2 ways to create and/or play around with your data. There might be more, but I’m okay with these 2 to be honest. They are,
- Using the UI on the website, or in Compass.
- Using the query language (called MQL) on the terminal of your computer, or on VS Code.
I am going to go with MQL since that way I get to learn the query language. Plus, I’ll be using MQL on VS Code since i can type my query in multiple lines, as compared to the terminal where I can only type my queries in a single line – which makes it so unreadable and difficult as a beginner.
By the way, MQL stands for MongoDB Query Language if you haven’t figured that out yet.
So,
- Fire up VS Code
- Go to Extensions and search for MongoDB for VS Code, and install it. This will allow us to write MQL easily.
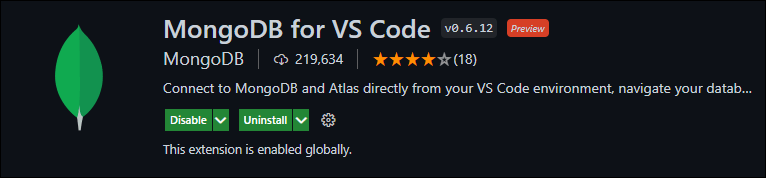
Now on the left side, you’ll see a leaf-like icon. That’s the MongoDB extension you just installed. Click on it.
- Now click on Add Connection from the left side.
- I have two options here – I’ll click Connect with Connection String
- I’ll now go back to MongoDB Atlas (on the website), and click on Overview tab and click Connect. This time however, I’ll choose Connect your application. The connection string is in the next screen. Before using it, I’ll have to update it by using my real password instead of ‘<password>’ and name of the database (‘Watchlist’) instead of ‘myFirstDatabase’.
- Press Enter
- Once the connection is established, you’ll see it on the left side. Expand it to see your database.
- Now go ahead and click on Create New Playground on the left side. This is where we type out all our queries.
Note: You’ll see a bunch of text already on the playground file when it opens up. Do yourself a favor, select all and delete it.
We’re now good to go.
To begin with, type in the following command and press the Play button. Moving forward, remember to select the command before running Play – if not, all queries in the Playground will be executed. That might not turn out to be fun.
Basics
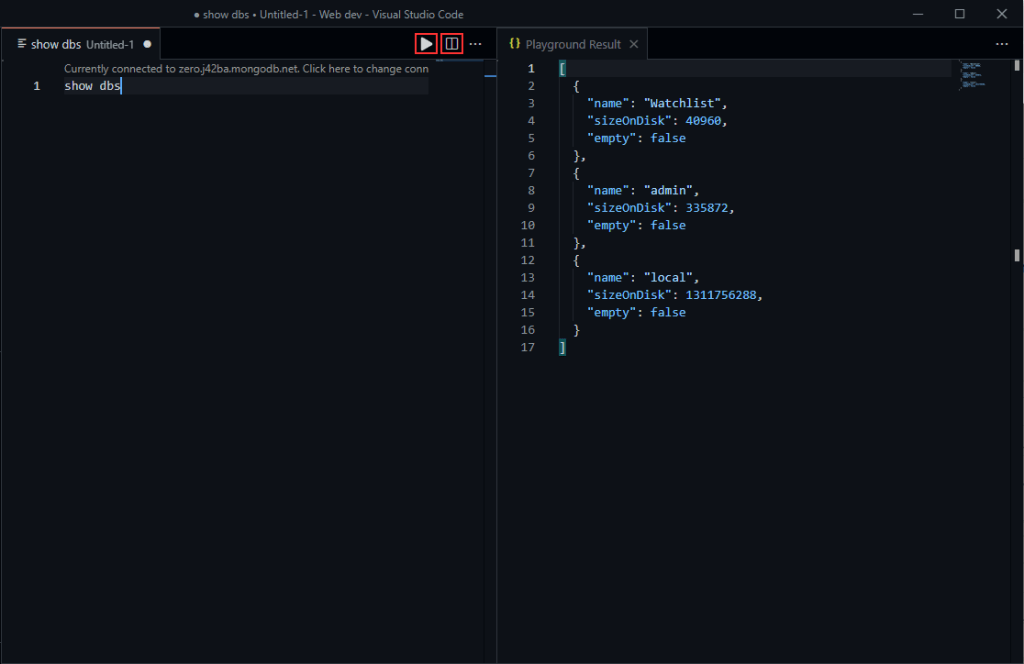
//show all databases
show dbsPlayground would show the results on the right side. If it doesn’t, use the Split screen button to achieve this. (shown in image below). you can ignore the admin and local databases by the way.
//select a database to work with
use Watchlist//show all collections in the current database
show collections
That’s our Movies collection – empty at the moment.
CRUD
CRUD is the foundation of any query language, coz all you are essentially doing with a database is Create, Read, Update and Delete. All the huge complex operations boils down to one of these, if you think about it. So, I’ll explain CRUD with the most simplest of examples below.
Create
All of the CRUD methods have two (or more) variants – which is make changes to one record, or make changes to many records at once. I’ll include both variants in this post.
//insertOne()
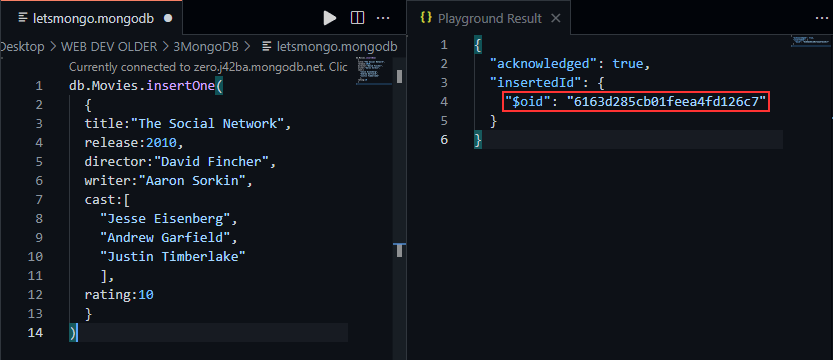
This method allows us to insert one document into our collection.
db.Movies.insertOne({
title: "The Social Network",
release: 2010,
director: "David Fincher",
writer: "Aaron Sorkin",
cast: [
     "Jesse Eisenberg",
     "Andrew Garfield",
     "Justin Timberlake"
],
rating: 10
})
Bit of explaining here on the first one. Basically, I am inserting one document into my collection. If you’re coming from SQL, collections are like tables, and documents are like a row of information. If you are new to databases, then it’s pretty much what it sounds like. We are building a collection of movies, and a document corresponds to one movie and information about it.
The documents I’ll be creating will have the following information for each movie.
- title – name of the movie (String)
- release – year of release (Integer)
- director – name of the director (String)
- writer – name of the writer (String)
- cast – name of actors (an array of Strings – will only contain 3 names)
- rating – my rating of each movie out of 10 (Integer)
MongoDB is really flexible which means, it doesn’t necessarily stick to all the rules you might be familiar with. This might be confusing in the beginning, it was for me too – but it’s less confusing now, so I think this is only going to improve and become easier for me. These are the things I noticed.
- I didn’t explicitly mention the data type. For strings, i used a quotes and for integers, i used a number. Although It might have thrown an error I am assuming if I used a String without quotes.
- I don’t have to stick with this format for every document I create. For example, I can create another document with only the title in it, and MongoDB would accept it. If you’re coming from SQL, you’d feel sick already – but like I said, we’re letting go of some of the rules here. You’ll get used to it.
- Each attribute you add is itself in a format of ‘key: value’, kinda like in a dictionary. You have the key (or word), and you have it’s value (or meaning). In the above document, for example, you have a key = title, and value = ‘The Social Network’.
- Ideally both key and value should be in quotes, but VS Code lets me use the key without quotes. Don’t know why, i guess Editors now understand it this way. Easier!
Note: MongoDB is also case sensitive. Meaning, if I run the above query but use ‘movies’ instead of ‘Movies’, MongoDB will not throw an error – instead it will create a new collection called ‘movies’ and insert the document into it. So you have to be really careful with casing.
The above document is shown in a tabular form below – kinda makes it easier to understand how the information is stored.
| title | release | director | writer | cast | rating |
| The Social Network | 2010 | David Fincher | Aaron Sorkin | Jesse Eisenberg, Andrew Garfield, Justin Timberlake | 10 |
Hope that makes sense.
Anyway, so insertOne() creates a new document and inserts into our Collection. This is what you’ll see in VS Code, sort of like a confirmation. The $oid is the Object ID – which is like a unique identifier that gets created automatically and assigned to each document.
To confirm this has gone through, I’ll refresh my Compass.
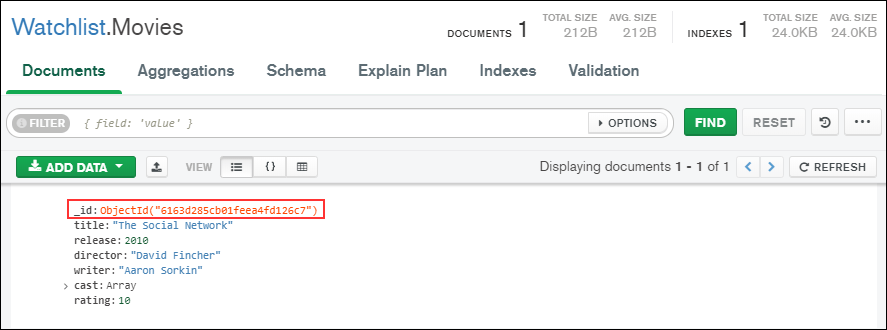
Sweet. Let’s continue.
//insertMany()
Allows to insert multiple documents into the collection.
db.Movies.insertMany(
  [
    {
      "title":"Inception",
      "release":2010,
      "director":"Christopher Nolan",
      "writer":"Christopher Nolan",
      "cast":[
        "Leonardo DiCaprio",
        "Joseph Gordon-Levitt",
        "Tom Hardy"
      ],
      "rating":10
    },
    {
      "title":"Prestige",
      "release":2006,
      "director":"Christopher Nolan",
      "writer":"Jonathan Nolan",
      "cast":[
        "Hugh Jackman",
        "Christian Bale",
        "Michael Caine"
      ],
      "rating":10
    },
    {
      "title":"Interstellar",
      "release":2010,
      "director":"Christopher Nolan",
      "writer":"Christopher Nolan",
      "cast":[
        "Matthew McConaughey",
        "Anne Hathaway",
        "Jessica Chastain"
      ],
      "rating":10
    },
    {
      "title":"The Dark Knight",
      "release":2008,
      "director":"Christopher Nolan",
      "writer":"Christopher Nolan",
      "cast":[
        "Christian Bale",
        "Michael Caine",
        "Heath Ledger"
      ],
      "rating":10
    },
    {
      "title":"Steve Jobs",
      "release":2015,
      "director":"Danny Boyle",
      "writer":"Aaron Sorkin",
      "cast":[
        "Michael Fassbender",
        "Kate Winslet",
        "Seth Rogen"
      ],
      "rating":9
    },
    {
      "title":"Need for Speed",
      "release":2014,
      "director":"Scott Waugh",
      "writer":"George Gatins",
      "cast":[
        "Aaron Paul",
        "Dominic Cooper",
        "Scott Medscudi"
      ],
      "rating":9
    },
    {
      "title":"Moneyball",
      "release":2011,
      "director":"Bennett Miller",
      "writer":"Aaron Sorkin",
      "cast":[
        "Brad Pitt",
        "Jonah Hill",
        "Philip Hoffman"
      ],
      "rating":7
    },
    {
      "title":"The Trial of the Chicago 7",
      "release":2020,
      "director":"Aaron Sorkin",
      "writer":"Aaron Sorkin",
      "cast":[
        "Sacha Baron Cohen",
        "Joseph Gordon-Levitt",
        "Eddie Redmayne"
      ],
      "rating":8
    },
    {
      "title":"Molly's Game",
      "release":2010,
      "director":"Aaron Sorkin",
      "writer":"Aaron Sorkin",
      "cast":[
        "Jessica Chastain",
        "Idris Elba",
        "Kevin Costner"
      ],
      "rating":7
    }
  ]
)
9 more documents inserted. Here’s a screenshot from Compass to show the documents in a tabular form.

that was insert. or C from CRUD.
Read
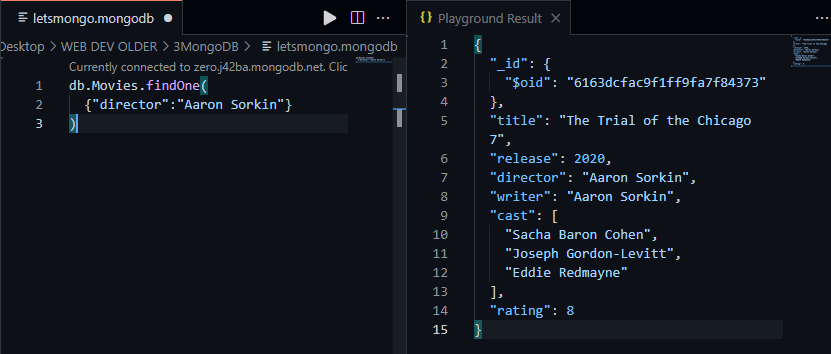
//findOne()
This method returns the first document that matches the condition which is specified inside the parenthesis. Let’s say – director: ‘Aaron Sorkin’
db.Movies.findOne(
  {"director":"Aaron Sorkin"}
)
this would be the result. The reason it chooses to return ‘The Trial of the Chicago 7’ among the two movies directed by Aaron Sorkin is that this document was created first in our collection. You’ll notice in the insertMany() query we did, this one comes above Molly’s Game – which is the other one.
If no conditions were specified in the above query, it would return the first document that was created in the collection.
//find()
Alternatively, if I need to display all movies that are directed by Aaron Sorkin from this collection, I’ll go with find(). This returns all documents that matches the condition I have specified in the parenthesis.
db.Movies.find(
  {"director":"Aaron Sorkin"}
)
and here’s the result
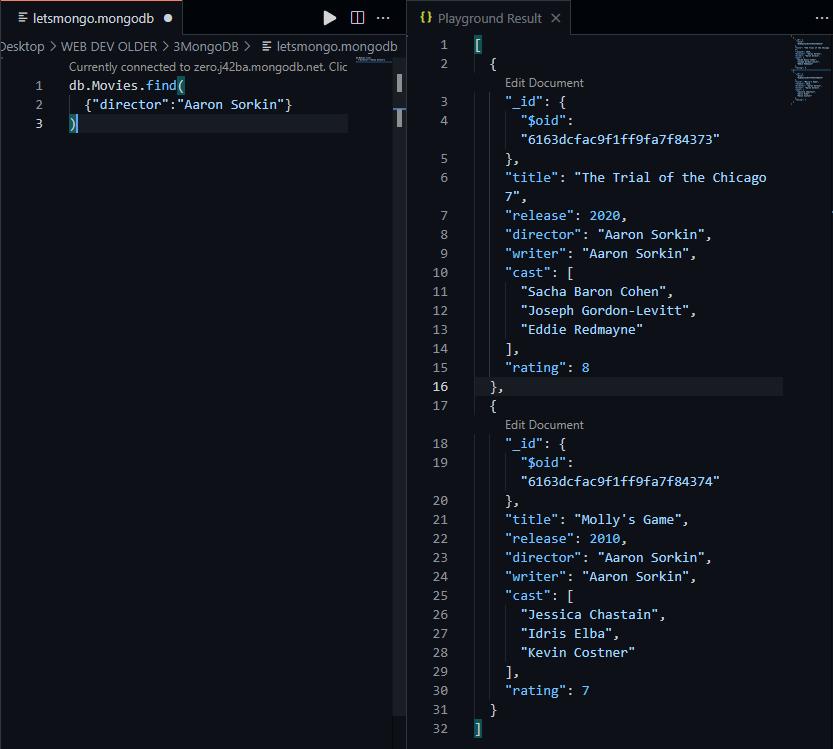
If no conditions were specified in the above query, it would return all the documents from the collection.
Update
//updateOne()
So I’ve just noticed that couple of movies have an incorrect release year in our collection. They are,
- Interstellar – 2010, but it should be 2014, and
- Molly’s Game – 2010, but should be 2017.
Let’s fix it. This is where we step into the Update part of the CRUD. The function updateOne() would update one document at a time – which would be the first one created in the collection that matches the condition specified. Since the changes have to be made to two seperate documents, I’ll need to write two separate updateOne queries.
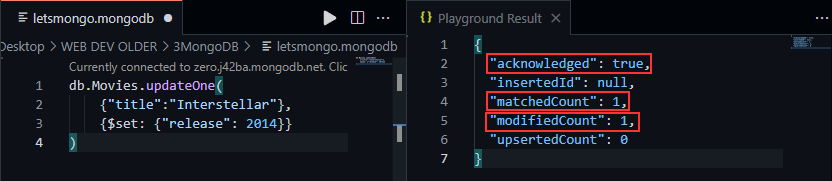
db.Movies.updateOne(
    {"title":"Interstellar"},
    {$set: {"release": 2014}}
)
That’s the format. the first part is the condition where I specify {“title”:”Interstellar”}, and the second part is the action to be taken once a document has been found. We use the $set operator here and pass in the new key:value pair.
If you are wondering why it’s written like this, well – coz you have to. That’s the syntax!
Here’s the result of the query in VS Code. It gives you some stats as well which tells you what happened when you ran the query.
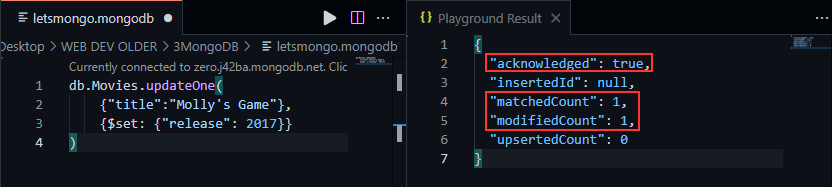
I am going to do the same for Molly’s Game as well.
db.Movies.updateOne(
    {"title":"Molly's Game"},
    {$set: {"release": 2017}}
)
and results,
And I’ll refresh my Compass to confirm the changes.
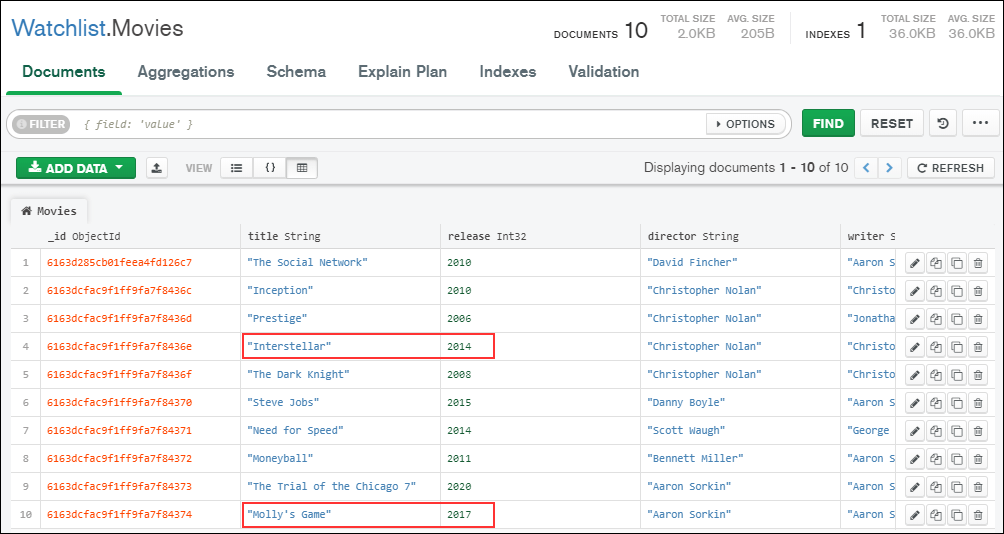
Looks good. Moving on.
//updateMany()
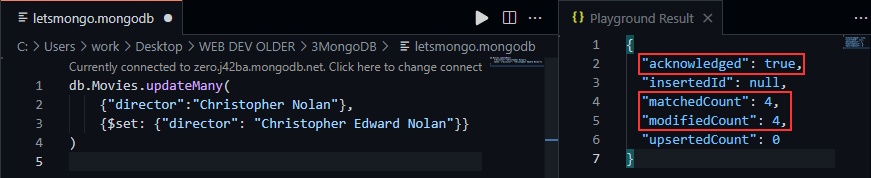
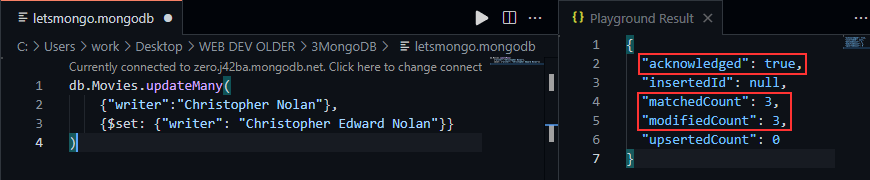
As the name suggests, this will update multiple records. I am going to update Christopher Nolan’s name to ‘Christopher Edward Nolan’. He does appear in two categories – director and writer, so I will need to write two queries, one for the director and one for the writer.
db.Movies.updateMany(
    {"director":"Christopher Nolan"},
    {$set: {"director": "Christopher Edward Nolan"}}
)
and the results. Says 4 documents have been modified where the name was ‘Christopher Nolan’
Now for the writer category
db.Movies.updateMany(
    {"writer":"Christopher Nolan"},
    {$set: {"writer": "Christopher Edward Nolan"}}
)
the result says 3 documents have been updated.
Refresh on the Compass, and here’s the confirmation of the changes.

Sweet. Time to get rid of some movies.
Delete
//deleteOne()
I am going to delete ‘The Dark Knight’ from my collection since that’s a superhero movie and kinda stands out from the rest coz of that. So you call the function deleteOne and pass your condition as an argument.
db.Movies.deleteOne(
    {title: "The Dark Knight"}
)
The result, as expected.

//deleteMany()
I’ll also go ahead and delete all the movies directed by Aaron Sorkin – coz I can! So we use deleteMany() and pass in the condition as argument. This will get rid of all the documents that matches the condition.
db.Movies.deleteMany(
    {director: "Aaron Sorkin"}
)
The result

Now, if I refresh Compass, I’ll have only 7 documents in my collection, and the following movies won’t be there
- The Dark Knight
- The Trial of the Chicago 7
- Molly’s Game
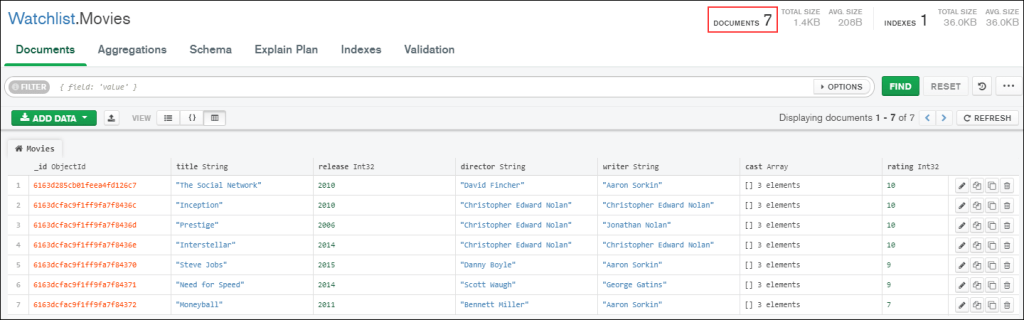
And that’s CRUD in the most basic form.
Operators
There’s a bunch of operators in MongoDB that you can use to modify your results. I’ve come across the following so far, and I think they cover the basic ones. But if you were to browse through the official documentation for MongoDB, you’ll find heaps out there – to confuse the hell out of you.
Also, all MongoDB operators will have a ‘$’ in front of the word to denote that its an operator.
Before I proceed, I am going to modify some of the ratings of the movies so I can get some good simple results to demonstrate the below operations.
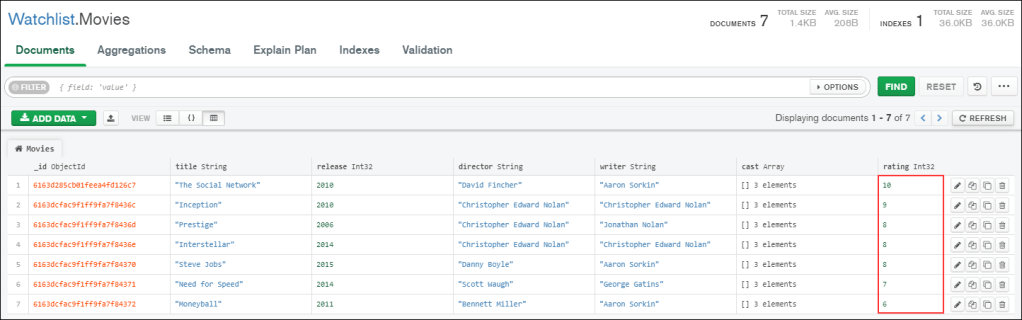
This is the how the collection looks like now, and this is what we will be working with from now. You can refer to it if you need to confirm if our operations are returning the correct values.
Comparison
You use the comparison operators when you want to compare the results against one or more values to narrow the results further down. For example, If I want to find the list of movies that have a rating greater than 8, I’ll use the appropriate comparison operator. I’ll explain in detail below.
Format: { <key>: {<operator>:<value>}}
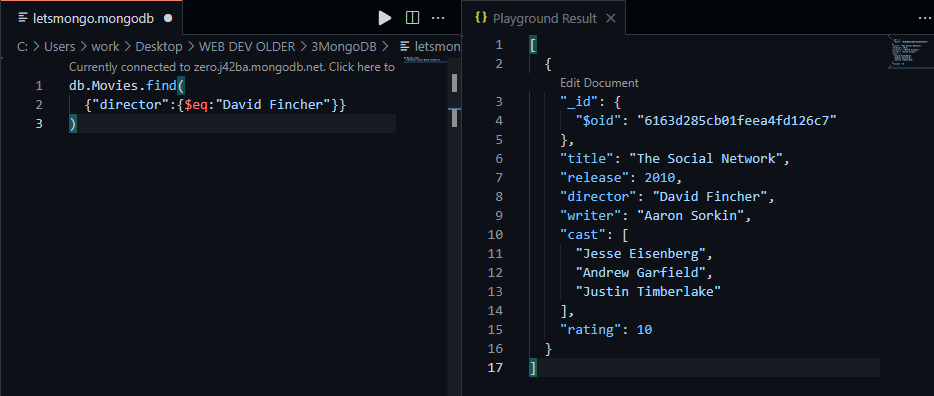
//$eq
The following will return all movies for which the director is ‘David Fincher’
db.Movies.find(
  {"director":{$eq:"David Fincher"}}
)
result,
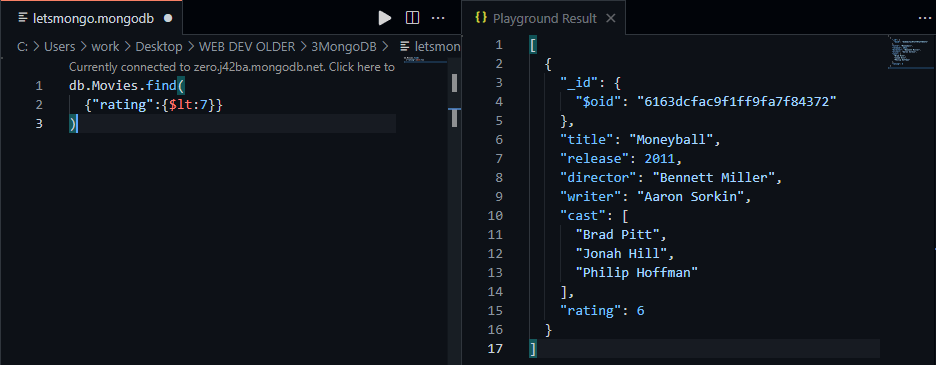
//$lt
The following will return all movies that has a rating less than 7
db.Movies.find(
  {"rating":{$lt:7}}
)
result,
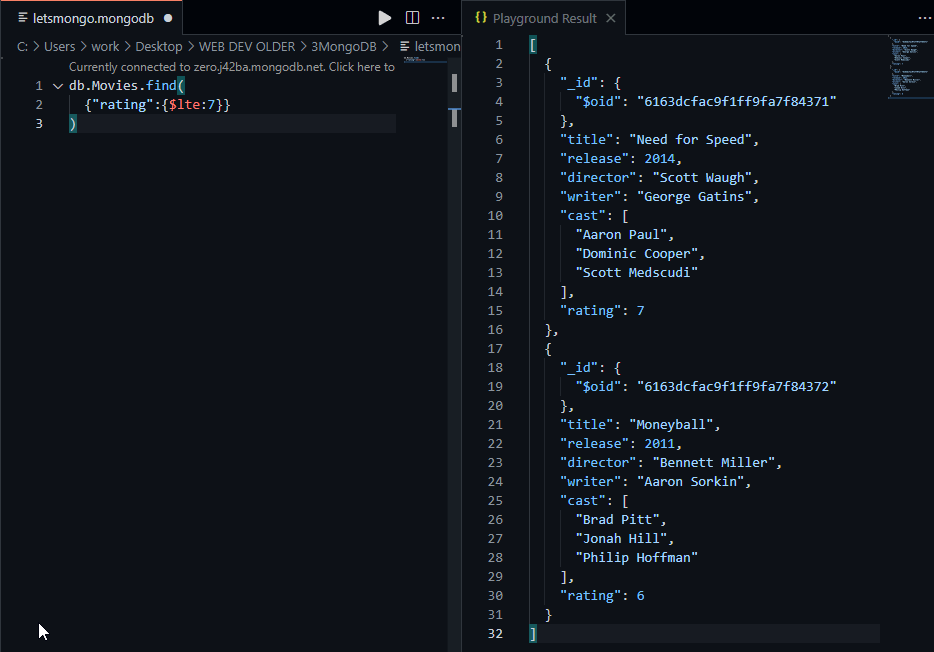
//$lte
The following will return all movies that has a rating less than or equal to 7
db.Movies.find(
  {"rating":{$lte:7}}
)
result,
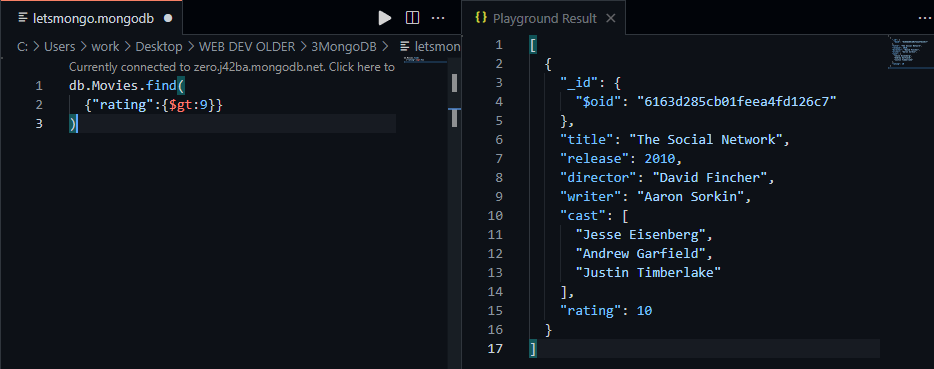
//$gt
The following will return movies that has a rating greater than 9
db.Movies.find(
  {"rating":{$gt:9}}
)
result,
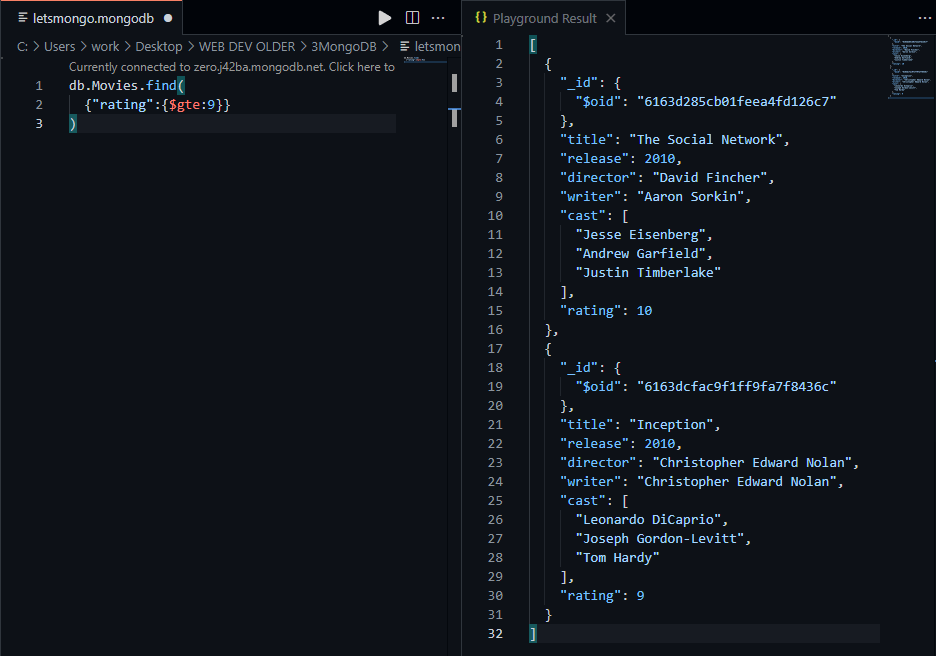
//gte
The following will return movies that has a rating greater than or equal to 9
db.Movies.find(
  {"rating":{$gte:9}}
)
result,
//$ne
The following will return all movies that does not have a rating of 8
db.Movies.find(
  {"rating":{$ne:8}}
)
result doesn’t fit in my VS Code for a screenshot since there are 4 movies. I’ll let you figure this one out.
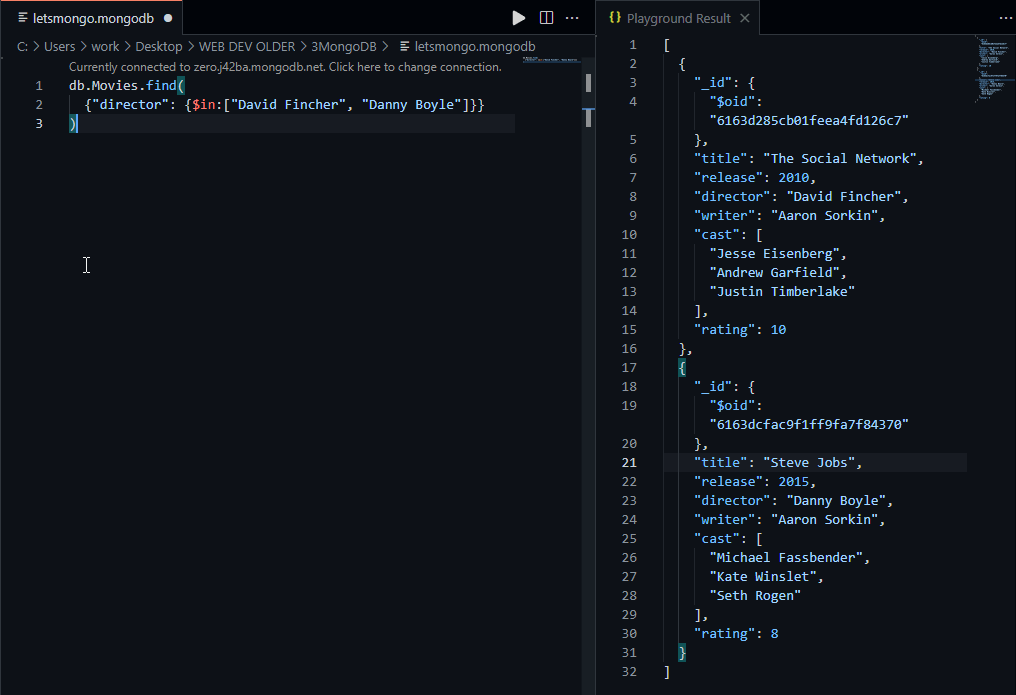
//$in
The following will return all movies if the director matches one from the list provided. In short, I only want to see the movies directed by either David Fincher or Danny Boyle.
db.Movies.find(
  {"director": {$in:["David Fincher", "Danny Boyle"]}}
)
result,
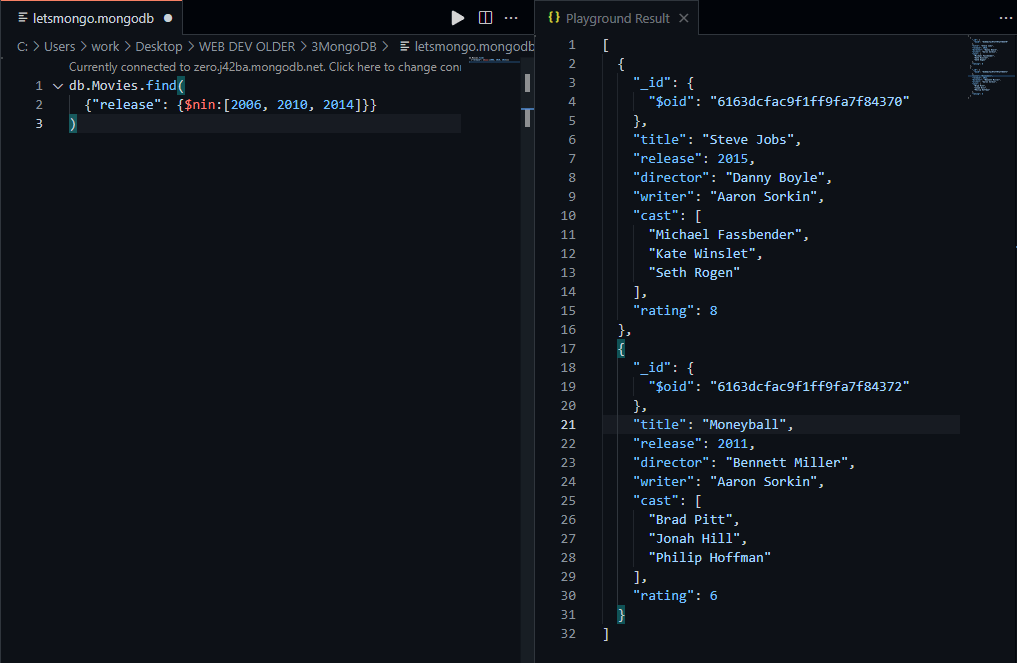
//$nin
This is the exact opposite of $in. The following will return movies that did not release in 2006, 2010 or 2014.
db.Movies.find(
  {"release": {$nin:[2006, 2010, 2014]}}
)
result,
sweet. let’s move on.
Logical
Logical operators allow you to combine multiple conditions to narrow down the results. The logical operators in MongoDB are – AND, OR, NOT and NOR.
Format: {<operator>:[{statement1}, {statement2},…]}
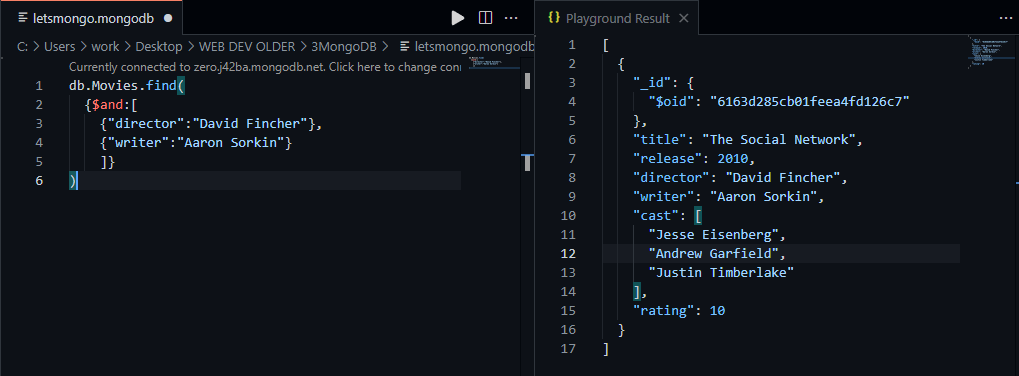
//$and
The following will return movies directed by David Fincher and written by Aaron Sorkin. Both conditions have to be met here.
db.Movies.find(
  {$and:[
    {"director":"David Fincher"},
    {"writer":"Aaron Sorkin"}
    ]}
)
result,
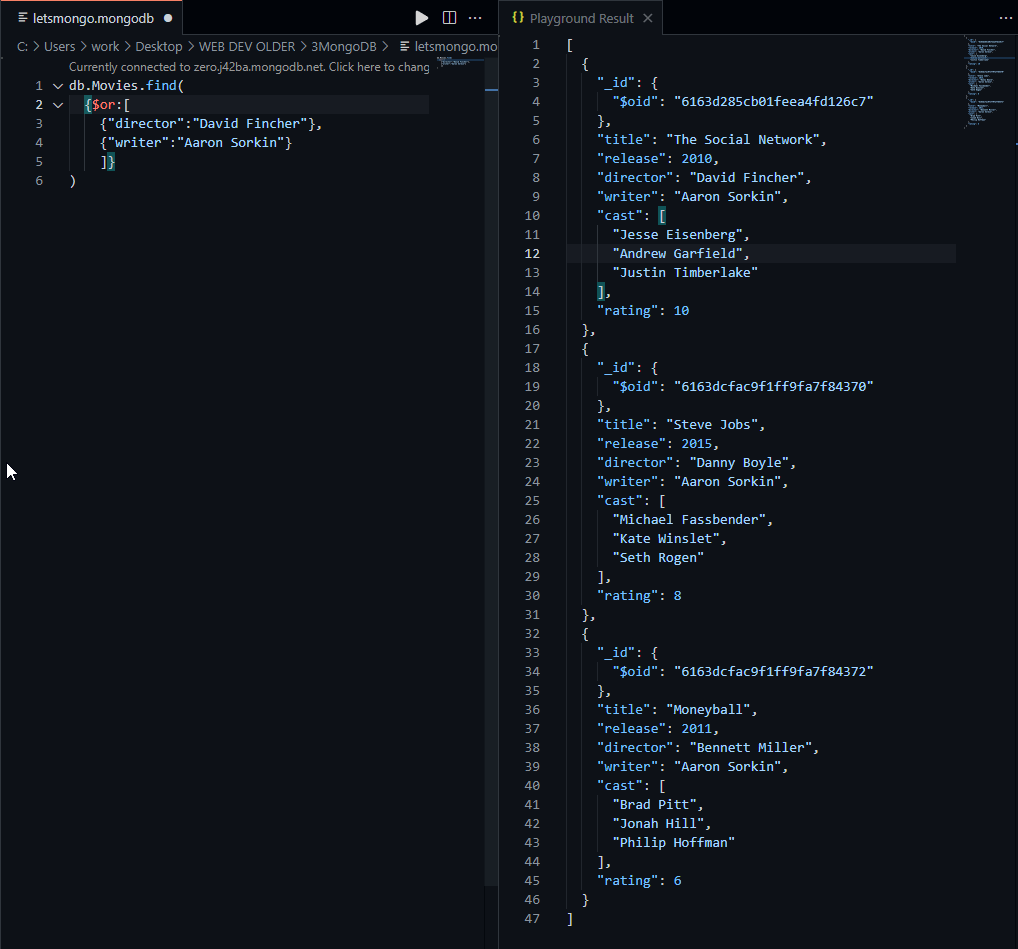
//$or
The following will return movies that are either directed by David Fincher, or written by Aaron Sorkin. Each document only has to meet any one condition to be added to the result.
db.Movies.find(
  {$or:[
    {"director":"David Fincher"},
    {"writer":"Aaron Sorkin"}
    ]}
)
result,
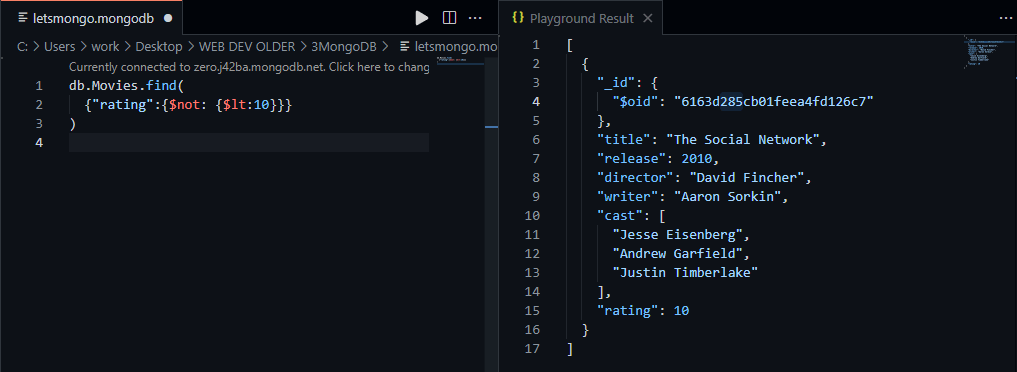
//$not
The following will return the movies that are not less than a 10.
db.Movies.find(
  {"rating":{$not: {$lt:10}}}
)
result,
//$nor
The following will return movies that are neither directed by David Fincher nor written by Aaron Sorkin.
db.Movies.find(
  {$nor:[
    {"director":"David Fincher"},
    {"writer":"Aaron Sorkin"}
    ]}
)
Result is the opposite of the $or query we did earlier. Again, too long in my VS Code to take screenshot, so I’ll skip this one too and let you figure it out.
’cause I can!
Projection
Noticed in some of the above queries, I couldn’t post a screenshot since it was too long to fit inside my VS Code. The reason for the result to be so long is that it’s displaying all the fields in every document. I don’t necessarily want to see all that information, sometimes I just want to see the name of the movie – and not the cast.
This is where projection comes to play. If you’re coming from SQL, this is the same as using ‘select column1, column2 from table‘ instead of ‘select * from table‘. Basically, instead of displaying all the fields, you tell MongoDB to display only the fields you want to see. This is achieved by adding a second condition to your query. This condition will look like this,
{title: 1, rating: 1}
If you want to display a field, you assign the number 1 to it. The query will only return the fields that you specify here, and will hide the ones that you don’t specify here. Except for – the _id field. This is displayed by default – but you can turn it off, by assigning a 0 to it.
Let’s use it on the above $nor query and see how the results look like.
db.Movies.find(
  {$nor:[
    {"director":"David Fincher"},
    {"writer":"Aaron Sorkin"}
    ]},
  {title: 1, rating: 1, _id: 0}
)
and the result,

This is actually my favorite thing in MQL so far.
Some update operators
//$inc
This allows you to modify the value of a numeric field by the amount you specify. In the following example, I’ll increase the rating of the movie ‘Moneyball’ by 6.
db.Movies.updateOne(
    {"title":"Moneyball"},
    {$inc: {"rating": 6}}
)
result,

I’ll confirm this in Compass,
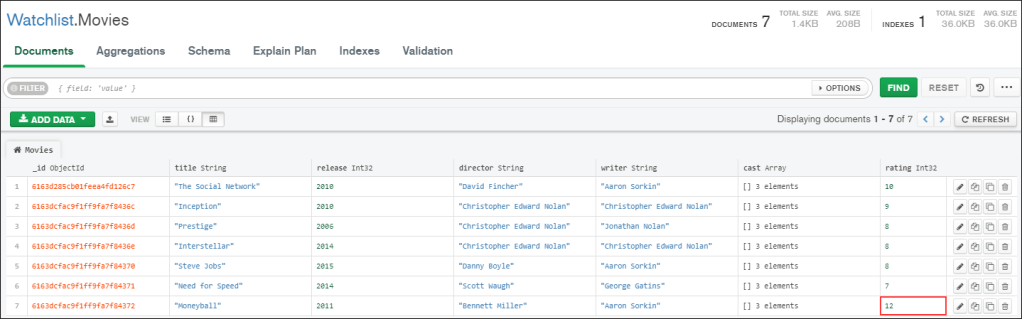
Cool. Although, doesn’t deserve a 12/10 in my opinion, so I’ll put it back to 6.
db.Movies.updateOne(
    {"title":"Moneyball"},
    {$inc: {"rating": -6}}
)
result,

and Compass,

//$push
Allows you to add an item to an array. The following query will add ‘Marion Cotillard’ as a fourth cast member to the movie ‘Inception’.
db.Movies.updateOne(
    {"title": "Inception"},
    {$push: {"cast": "Marion Cotillard"}}
)
result,

and Compass says,
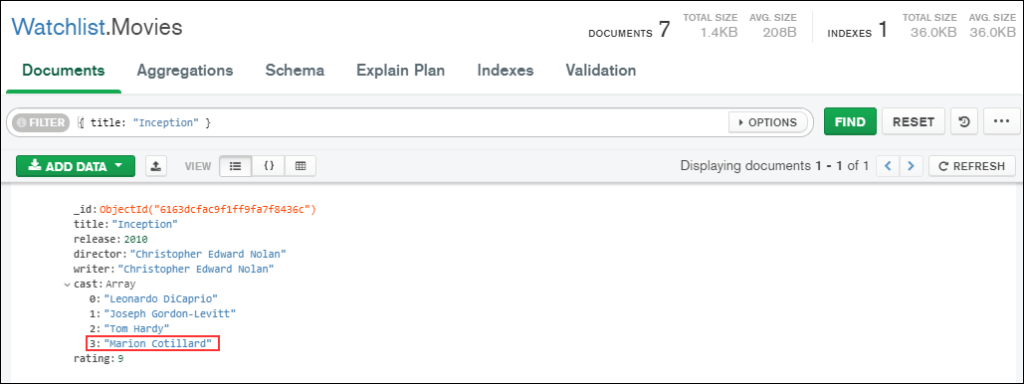
Marion Cotillard is added to the end of the array. And that’s how you search for a document in Compass or Atlas by the way.
//$pop
Allows you to remove either the first or the last element of an array by specifying the number -1 or 1 respectively. Here, Marion Cotillard is the last element in the array, so we’ll get rid of her to keep the cast array at 3 people – same like every other document in this collection.
db.Movies.updateOne(
    {"title": "Inception"},
    {$pop: {"cast": 1}}
)
result,

Compass,
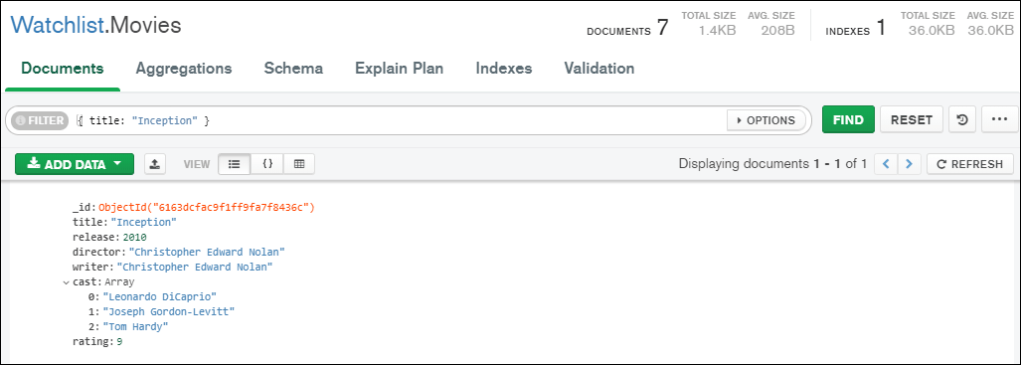
She’s gone.
Some useful functions
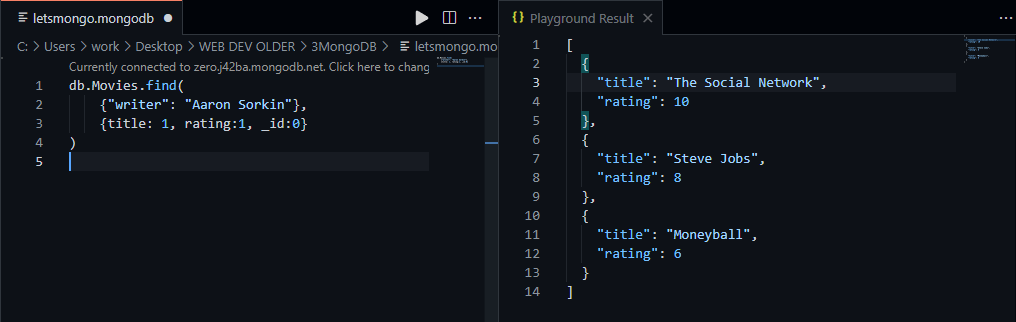
Yeah these might come in handy. Let’s say I want a list of movies that are written by Aaron Sorkin. I’ll make sure to include a projection so it only displays the title and rating. Here’s what the query would look like.
db.Movies.find(
    {"writer": "Aaron Sorkin"},
    {title: 1, rating:1, _id:0}
)
result,
//sort()
Imagine if I want to sort this result in ascending order of rating. I can call the sort() function on this query and pass in a sort by field, and a number – either 1 (ascending) or -1 (descending). So the query becomes,
db.Movies.find(
    {"writer": "Aaron Sorkin"},
    {title: 1, rating:1, _id:0}
).sort(
  {rating: 1}
)
result,
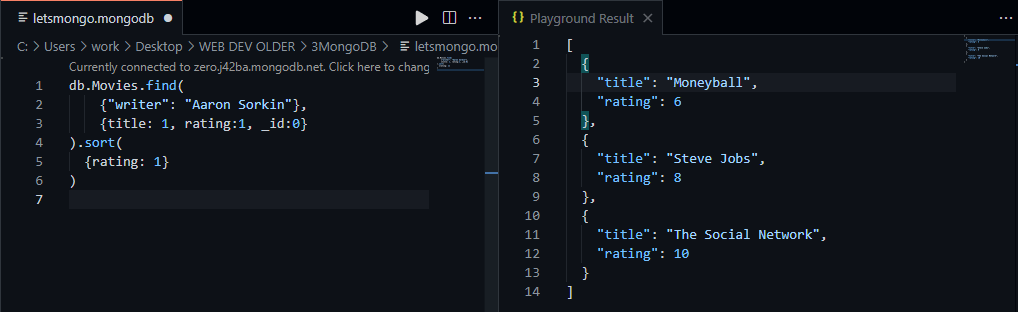
well well well, how the turn tables.. .
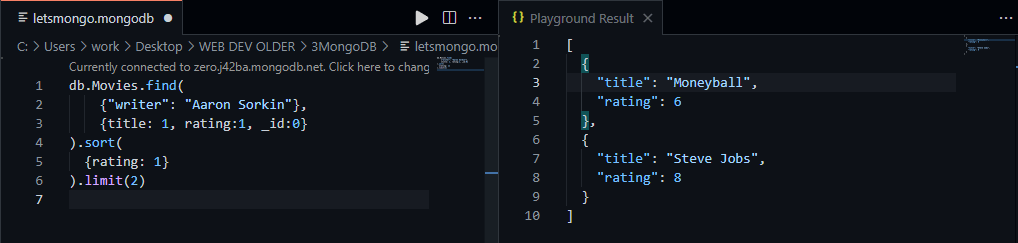
//limit()
So, now let’s say I only want to display the first two documents. In this scenario, it will be lowest rated movies written by Aaron Sorkin. I can use the limit() function and specify the number of documents I want to see as an argument.
db.Movies.find(
    {"writer": "Aaron Sorkin"},
    {title: 1, rating:1, _id:0}
).sort(
  {rating: 1}
).limit(2)
result,
//count()
Now, going back to the original query before sort() and limit(), let’s say I just wanted a count of how many Aaron Sorkin written movies are in the collection, I can call the count() function.
db.Movies.find(
    {"writer": "Aaron Sorkin"},
    {title: 1, rating:1, _id:0}
).count()
result,

Sweet.
We’ve come a long way. At least I felt it – never written a post so long anyway. So statistically for me – true; In terms of the topics covered, yeah – sort of. I mean it does cover the basic functionalities. If you know the above, you know how to play around with a MongoDB database safely. But this is just the beginning, there’s heaps of stuff to be learned if you seriously want to get into MongoDB. You could go with the official documentation, or the official video courses in MongoDB university section. You can learn about things like Aggregate Framework, how to use MongoDB with various programming languages etc – these are like advanced topics.
Here are some links that may help you.
Official documentation
https://docs.mongodb.com/
MongoDB University
https://university.mongodb.com/
What’s next?
Well, we’ve got the M out of MERN covered. Next up, if you look from ground below – it’s our server. So, in the next post of this series, I’ll use Node to connect to this database. We’ll then play around and get familiar with the basics of Node.js.
Until next time.
